BUY A NEEDLEPRINT INFINITY CHART TODAY AND START STITCHING IT TODAY!

........ NO POSTAGE TO PAY - DOWNLOAD THE SAME DAY........
.....Needleprint is committed to giving high value to stitchers .....
in addition to reducing our carbon foot print by 30%. This is how we thought of INFINITY CHARTS. These are charts in PDF format and EDITABLE format for you to download with no postage or guilty air miles. Even better, you can download charts ready to recompose, recolour and change initials (or whatever your heart designs!) in Jane Greenoff's PC Cross Stitch Designer or MacStitch Charting Software. You become the Designer. Infinity Library Motifs are Copyright Free. If you don't have Jane Greenoff's Cross Stitch Designer Software you can buy it now. It comes bundled with editable versions of the Beatrix Potter and Mary Wigham Quaker charts for $20, $14, £10, 2000 Yen.

Saturday 14 November 2009

Classic Clox on Sox

There is so much you can do to embellish your sox clox that it is difficult for me to find a place to start. But let's look at how, using your infinity chart, you can design a sock with two stitched sides, make the pattern more your own, customize it with an alphabet - oh, and let's just optimise it to use up least linen while we are at it! Here is what you can do.

Copy the sock you want to work on to a new file and give it a new name so you can find it later. We can replace the central design with one of the other clocks on the chart, or change the one we have a little. Let's change this. First we'll move it up the sock a little by lassoing it and positioning it further up the sock.

Now let's lengthen the tail of the clock to bring it down closer to the heel. Lasso the tail, copy it and paste it below the existing tail.

You should now have something that looks like this.

We want to create two sides for our sock, so now make a copy of the first sock and paste it down next to its twin.

We now have to flip the twin horizontal so we have a matching pair for stitching. Just find Function on the top tool bar and choose Flip Horizontal. Now you have it.

If we stitch these on a piece of linen we shall certainly have a matching pair - but what of lot of wasted linen. Go to Function again and this time select Flip Vertical. Now we can use the lasso to bring the second sock closer to the first to minimise waste. If you don't get the position right first time, remember you can simply click Edit and then Undo and have another go. It is worth taking a little time to get this right.

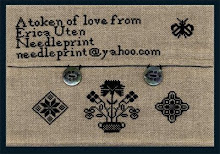
Now you can personalize your sock by adding a friend's name. I like to think about my friends whenever I stitch their names, imagining I am stitching good health, love and happiness into their lives.

And if you click on this alphabet you should be able to see it well enough to compose the names of your friends also.

Wednesday 30 September 2009

Editing and Recolouring Back Stitch


So far, the editing and recolouring we have discussed has been fairly straight forward. And then there is back stitch...... This is a little more tricky and can be frustrating without a bit of guidance, so here I'll do my best to lead you away from the quagmires and quicksands. The Alpursa collection has back stitch to define the outline of the cards, the inner cartouches, lettering and some representations of tendrils and pine-needles and you will need to handle these if you want to make changes.
3 very important things to know about back stitches:
1. You cannot use the Palette>Find Colour option to discover what colour has been used in any back stitch so that you can edit its colour on the palette.
2. You cannot delete back stitch with the erase tool.
3. You need to be careful when lassoing to edit or move elements that include back stitch as you can easily loose back stitches.
So, if you are wanting to work on any design that includes back stitch my advice is: first save your file under another name; then delete down all the items you do not want using the lasso tool, until you have on your sheet just the items you want to work with.

1. Identify the colours that have been used to draw the back stitch by right clicking on likely palette colours and turning them off.

When your back stitches disappear you have found their corresponding colour. Make a note of which palette key corresponds to the back stitch, this will save you oodles of time later. Isolate your back stitch from any cross stitch which may share the same palette key. When you turn off the back stitch colour, do you notice any cross stitches disappearing in your palette at the same time?

If so, find an unused colour on your palette and duplicate the colour, then recolour the cross stitch using this palette key. Now you can change the colour of the back stitch without affecting the colour of any cross stitch.

2. You can delete backstitch by redrawing another back stitch line over the top. But there lies quicksand. Do not go there. You will get suckered into endless frustration and lose the will to get out. To delete back stitch you need to lasso it and hit the delete key. If there is a long row of back stitch, like the card outline, you cannot delete half of it, if, for instance you wanted to make one half green and the other half red. The backstitch has been drawn as one continuous line and forms a single element, not a series of elements, and so you have to delete it all and then redraw it in the red and green sections you want. You only need to run the lasso along one row or column that borders the back stitch line to delete it.


3. This is why you have to take care when lassoing an element that includes back stitch - you cannot run the lasso along the line of back stitch itself or you will leave the back stitch behind. You need to have one row or column safety margin around the element to keep it intact.

Tuesday 29 September 2009

Printing Greetings Cards and Tags from your Needleprint Infinity Files

Is it just me, or do I detect a nip in the air and a feeling I should be thinking ahead more that I have been doing lately? When I was going through my ideas file and came across the Altpursa Chocolate cross stitch album cards, I thought what lovely gift tags and cards they would make for friends. And if time runs out for stitching them ourselves, well, it is always lovely to send a chart to a friend so they can stitch in the holiday after Christmas, isn't it? I know I love having them sent to me.

The new Needleprint Infinity Chart is rather more than a chart. There are four pdf files for you to download as well as an editable JGG file. Two of the four pdfs are facsimiles of the original Altpursa album charts themselves and are in high resolution format so you can print them onto card, cut them out and make your own album. One of these facsimile sets has the Alpursa name removed, providing you with a blank canvas to write your own words then you can print these out and use them as gift tags or fix them to a nice home-made card. The other two pdfs are replica charts we have made and you can use them for stitching the patterns, gift tags or embellishments to greetings cards. Plus, if you have the Infinity software there are infinitely more options for you. You can copy a design from the file, pop it in another work file and customise it. I can hear you saying, 'Nice colours, Jacqueline, but not what I would have chosen, personally.' And you will never have to put up with my colour palette again, simply personlize the perfect palette for you.


Remember you can change background colour. Use back stitch to doodle a little message in the cartouche - you can use a formal alphabet, or just curl something ditsy to amuse you and your friends.

When you have a design the way you like it, copy and paste it until you have six or eight on a page. To see how they will look on a printed page, choose Print Chart from the File Menu and then, when you have the dialogue box, keep checking Preview until you have the layout that works best.
Change the grid to display just thin lines which looks so much prettier for a card or tag.
To create an outer border around the set of cards, use the lasso to provide a frame for your printed work, whatever is in the lasso will be printed.


When you think you have it right, choose the print to pdf option so you can really see how it is going to look. This is how my attempt will look on a printed page. It is not bad at all, but I think I can do a better layout than that, so I might just go back and tweak it a little more. I hope that gives you an idea of the infinite enjoyment that lays in store for you. This is just a quick tour tonight, but I'll go through the stages in more detail this week to show how you can make some really special and unique cards. Mmm, maybe I shall have a little sherry to get in the mood. What do you think? Will you join me?

Thursday 17 September 2009

Designing Medallions with Ease and Speed


There are so many possibilities for medallion design as you have seen from the Ackworth samplers. When I first carried out the research on the medallions, I charted everything. The aim of the research was to see if there were certain Ur-Motifs or fundamental motifs from which others had been copied. If this were true then we might be able to put forward the hypothesis that some samplers were 'model' or 'teaching' samplers and that the other girls had recourse to these as pattern books for working the medallions on their own samplers. What I did find out was that, with the sample we had, no medallions appeared to have been copied from a single source. In fact, all the medallion patterns differed slightly from sampler to sampler. Some had slightly different borders, others minor adaptions. The girls were doing exactly what you do, making slight personal changes...or mistakes which they worked into the overall design with a certain aplomb!
Which means you are free to customise your medallions, or design new ones. And the wonderful thing is, you only have to design a quarter of the medallion and then let the software do the rest for you. The important thing always to remember is to ensure that the central horizontal and vertical lines of the design are included. Think of these as pivot points for your design. First create a quadrant - the bottom left hand quadrant is a good place to start - but don't worry if you prefer to start work with a different quadrant in your design, I'll discuss later what is to be done if this is the case (as it is for me!), but for now just grasp the concept by its tail.

Once you have this quadrant, closely lasso it, (by that I mean make sure there is no border of blank cells anywhere on the graph that you enclose).
Next choose Functions from the top tool bar and select Mirror Vertical.

Now you have two quadrants - plus a mirrored central horizontal axis. It is quite simple to remove this duplicated pattern line simply by grabbing the bottom quadrant and moving it one square up. You can appreciate that it is far easier to take out this line, than to have to fill it in later and that is why it is always important to include these central lines in your design at the start.

So now you have half a medallion, all you need to do is lasso it closely and choose Functions from the top tool bar and this time select Mirror Horizontal from the drop down menu.

Now you have a whole medallion - plus a duplicated central pattern line and you know how to remove that now, don't you? Simply move the left hand half of the design horizontally one square to the right.

OK, so what happens if you are awkward like me and you only seem able to design top left hand quadrants and can't seem to get into the habit of designing bottom left hand quadrants? Stay as sweet as you are, is my motto.

Design the top left hand quadrant and when you are done, lasso it closely and choose Flip Vertical from the drop down Functions menu and there you are, right where you need to be to generate the other quadrants of your medallion with ease and speed
.

Wednesday 16 September 2009

Using Function Magic to Save You Time

I have just released a library of editable Old European Borders for you to use on some beautiful new projects. When you look at it, you will no doubt think, one corner does not a rectangle or square make, Jacqueline, what on earth am I supposed to do with a single corner? So, let me show you. If you look at the top tool bar, right next to Tools is Functions and Functions are there to save you oodles of time when you are designing. Let's start by clipping a nice border out of the new library. It already has the bottom right hand corner turned and we shall use that corner to generate some Function magic and the rest of a frame. I am going to keep this simple, but you will see from the stages how you can customise borders to fit your projects.

The first thing I am going to do is to lasso that corner closely and Edit>Copy and Edit>Paste it in a little space all to itself. So we have two corners, but the new one is not much use, it is facing the wrong direction. Let's flip it around.

I choose Functions up on the top tool bar and run down the menu until I see Flip Horizontal and I select that. Hey Presto I have a corner I can use on the left hand side now.

I lasso this closely again so that I know the lasso goes just to the edges of the design and no further and I drag that corner so that it is sitting next to where I am going to place it, with the bottom edges of the two sections lined up. Now I examine the corner closely and examine the section of the border where I am going to make the join. I could copy and paste another section of the border and insert the extra section of border to fill the gap, or I can, as I am going to do now, remove some of the border, by lassoing and hitting the delete key to clear away the duplicate section.

Now I can make a clean join. Because I have lassoed closely I know exact where I must now place the leading edge of the corner to make the join. Don't worry if you make a mistake, simply go to the top tool bar and click on Edit>Undo and at a stroke the world will be put to rights. But you will have to lasso again to restart. OK. Now I have two corners. And with two corners, using Function magic I can quickly make four.

I have closely lassoed all the border I have at the moment. Now I go up to the top tool bar, choose Function, and this time from the drop down menu I am going to choose Mirror Vertical.
Abracadabra, I have four corners and a completed frame - well almost - it needs a little more polishing to make it just as I want it.

I shall drag the lower half well away from the mirrored top to give myself a bit of design space to play in and identify and lasso a missing section from the side of the existing border, Edit>Copy and Edit>Paste it first on the left hand side, next on the right hand side. Try doing the left hand side first to see if that works also. It does? Well, isn't that a wonder!

Now all I have to do is to lasso closely the bottom half of the frame and move it upward to close the join. How long did that take? That's what I call Function Magic. Now what Design Magic are you going to work with your borders? More Function Magic tomorrow.

Tuesday 15 September 2009

Free Infinity Download - Dutch/Scottish Arcaded Floral Band


Here is a free Infinity download of the arcaded band for your collection - just click here to download. Remember to choose the option to Save and not Open. If you don't have the software to read the Infinity charts, click here. You will be able to purchase the software for $20 which comes with the Beatrix Potter Sampler ready for you to edit and customise - and once you have the software you will also be able to download a free editable Mary Wigham sampler also. (Again, remember to choose Save and not Open when you download.)

Saturday 5 September 2009

Free Infinity Downloads of Mary Wigham

A little while ago Florence asked if she could have permission to adapt the Mary Wigham sampler to make a fund-raising postcard for her church. It is really kind when people ask permission to reproduce items, and I do appreciate the thoughtfulness in asking. The policy is that any unique newly created composition of Quaker motifs, using the Ackworth School Pattern Book, or other sampler charts is OK for personal and commercial use. We simply ask that people do not replicate for sale existing museum samplers - anywhere. It is totally unnecessary to do that. I really enjoy seeing the finished compositions, and so I was thrilled that Florence sent me an image of the completed postcard. I hope it does well for your church, Florence.
To thank you for all your support, you can now download editable Infinity versions of Mary Wigham. This means you can easily change and customize your charts. You do need the Jane Greenoff software (or MacStitch) to use these Infinity charts and you can purchase the software and a Beatrix Potter Infinity chart for $20 by clicking here. Then you will also be able to make the most of the other Infinity charts coming on stream like the Judith Hayle Composition chart.
Detailed tutorials to help you get he best out of the Infinity charts and software can be found on our blog NeedleprintInfinity.Blogspot.com. Simply choose whether you want the over 1 or over 2 version and click the appropriate link. When you have done this, choose Save for the option and save the file in a folder with your other Infinity charts.
Mary Wigham Over 1
.
Mary Wigham Over 2
.

Tuesday 1 September 2009

Free Infinity Charts of Mary Wigham

I have had a number of emails wondering about copyright on these charts. The policy is that any unique, newly-created composition of Quaker motifs, using the Ackworth School Pattern Book, or other sampler charts - whether pdf, paper or Infinity, is OK for both personal and commercial use. We simply ask that people do not replicate for sale existing museum samplers - anywhere. It is totally unnecessary to do that. There are so many wonderful projects that you can create by customizing the motifs on these charts that will delight you and your friends - I would like you to realize you can be your own designer from now on. Infinity is the limit!

Monday 31 August 2009

Special Stitches

Just as you have created a motif library, it is possible for you to create a library of stitches with representations of the different stitches you may have to work on a sampler. It is not important that the symbol you have created looks like a proper stitch diagram in itself, it is only there to represent a certain stitch. However, it is important that the symbol should occupy the same amount of space relative to a cross stitch, as the worked stitch itself. Here are some examples for you to see. On the left hand side you can see two very different examples of symbols for Algerian Eye. The version at the top is the one you see on the Judith Hayle Composition Infinity Chart - it is more diagrammatic, and I think it is easier to read. The bottom version is a more literal interpretation of the stitch, and it may be the one you prefer. On the right you can see symbols for Four-Sided Stitch and a Kloster Block. Because some of these symbols incorporate backstitches there may be a blank border of stitches surrounding the motive so load the motifs in a work file and see how they are composed. Once you ahve the motif downloaded, you can simply copy and paste and paste unitl you have the desired number of symbols you need for your chart.
To help you I have created a stitch library for you to download. You need to click on the link and save the file to the following folder C:\Program Files\FOCUSMM\JGDESIGNER\ - where is the name you gave to the folder called User (and you may still have it as User).
Click here to download the Stitch Motif File.

Sunday 30 August 2009

Backstitch

Backstitch or double-running stitch is a common feature of many samplers. To create backstitch on your chart is very easy - though deleting it and copying it can be less than straightforward and at the end of this post I will describe a few pitfalls which I hope won't swallow you up.
To include backstitch in your project click on the zig-zag stitch below the various cross stitch symbols. Once you have chosen the colour you want to use, then you can start backstitching right away.
However, there are a number of choices you can exercise which will aid the legibility of your work. You can define the colour of your lines and the width. It is worthwhile experimenting until you find the backstitch that is right for you.

Here are some examples of how the backstitch looks at the thickness I chose for this example. The important thing to notice is that the line can be drawn from the mid position as well as the end position. You might find it easier to increase the magnification of your chart while working backstitch since it is easy to start or end your backstitch a half stitch away from where you probably intended. A line, once drawn, can only be deleted in its entirety, either by enclosing with the lasso and deleting, or by drawing the stitch again over the top. You cannot delete parts of lines. If you have a long line of stitches which you have created incrementally, you will never be able to delete it by drawing over the top, unless you remember precisely where you drew the original sections. To insert a long line of stitches, I usually work out the placement and first mark the limits of the line I want to draw with a special colour cross stitch which I later delete. This means I can draw the line all in one go. (And so delete it all in one go, if necessary.) The importance of closely defining motifs or elements when you are copying them for pasting or for adding to the motif library have been repeatedly stressed. However, for copying sections containing backstitch you will need to leave a gap of one stitch all around, otherwise if you copy on the line, it may or may not transfer correctly. If you are planning to print out a chart containing backstitch to work from then you will need to print out in colour, or find a way of annotating a black and white print to indicate the colour of the backstitch lines.
Related Posts with Thumbnails